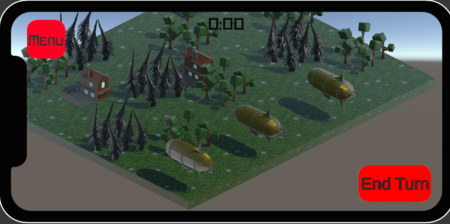
SteamPunk Strategy is a Medium fidelity game demo created in the Unity game Engine. This game is a single player isometric stylized turn based strategy game. Gameplay consists of moving player airships to conquer and control land in order to place settlements, this allows the player to expand their empire. The goal of the game is to defeat the enemy robots and conquer all the land on the planet. During the course of the game the player will have to manage resources such as food and wood, these resources will deplete at the end of each turn it is the player's job to not over expand their steampunk empire. This game was heavily inspired by another popular mobile strategy game known as The Battle of Polytopia, however it took inspiration from other turn-based strategy games such as Civilization 6 and HumanKind. Our goal of this project was to create a mobile game with widespread appeal to communicate the importance of resource management especially that of food management to align with goals of SDG 2 - a vision for a world without hunger or malnutrition. The game contains the main elements of a functional final game product including an abundance of 3d models, a main menu and UI, a settings menu, sound effects and music. The game however in its current state does not contain a fully functional gameplay loop as it lacks several of the primary gameplay elements such as resource management mechanic, functional enemies, ability to conquer and maintain lands. Overall Steampunk Strategy attempts to impart knowledge of resource management and high level strategy to the large mobile marketplace through the use of fun and interesting gameplay mechanics.
The Objective for this game project was to create a mobile game that met the required criteria.Those criteria are listed below:Game must run at a solid 30fps minimum on profiled hardware(android), Total Game asset file size must be less than 500mb, Must be controller, touchscreen or gyro controlled, Must have a main menu, pause menu, settings menu and have the ability to toggle sound and music on and off separately ,Consist of at least one complete level/encounter/tutorial as a vertical slice
Due to the complex nature of the project in question it was split up into several parts, this project required each group member to create one script/mechanic and at least one 3D model. This being considered my personal assignments as agreed upon by the group was primarily to create a click to move tile based movement system. Secondly I was tasked with the creation of a pine tree 3D model. Refer to the designated sections below to find out more about the processes used. Other tasks that fell under my jurisdiction included UI/menus and compilation of game assets to create the final product.
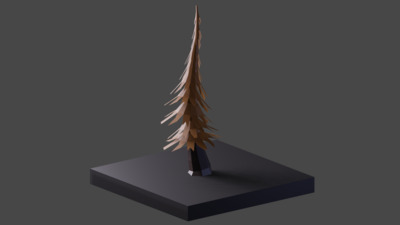
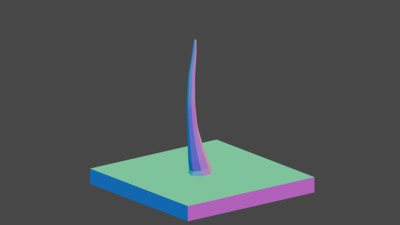
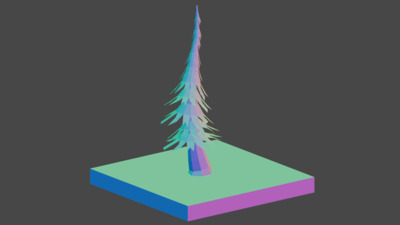
The resulting tree was created with the help of a tutorial by the Youtube user VeryHotShark. To begin the tree trunk I first collapsed the default cube to center to create a single vertex, then I extruded these vertex upward into a shape I was happy with. Next I added a subdivision surface modifier in preparation for the next modifier, a skin modifier was then added to give the trunk some substance. The subdivision surface modifier applied earlier will round out the skin giving a tree trunk like shape as seen in the images to the right. I found this method of shaping the tree trunk easier than following the video as Rob had previously demostrated this method.

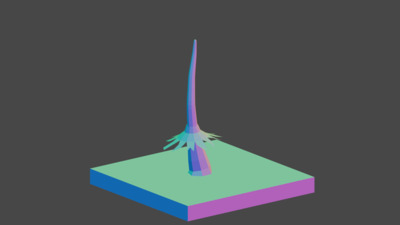
The next part of the process is where I began to use the tutorial video. Similarly to the video I began with a plane which I extended out 12 units on the grid length wise and 3 units height wise. I then used the knife tool to cut some jagged shapes into the bottom of the plane to create the edges of the leaves. I then applied the rotation and scale of the plane to prepare it for the next step which involves the use of the simple deform modifier, the bend portion of the modifier I was able to create a cylinder with what appears to be frayed edges at the bottom. Next I began decreasing the size of the top and center loop cuts to create an exponential curve. Then using proportional editing I decreased the size of the base of the cylinder to look more like a cone. Lastly I duplicated these shapes and added them to the shape of the tree trunk. Unlike the video I did not use a solidify modifier on the leaves due to the game's camera being located above the trees.
The first script created was the movement script titled “test” this script can be seen below. This script was created as soon as the assignment was given and as such features many quirks that were intended to be fixed. This script's function is to allow the player to move on a grid using unity’s tile map package. It begins by using the camera to determine where a player can click to a set of coordinates due to the camera being on an isometric view. It then gets the tile map component, this map restricts the player's movement to the center of each designated tile similar to chess. When the player clicks on the screen the script then gets the position of the clicked area, it then associates the position to the nearest tile. At the center of the nearest tile it creates an object, this object's purpose is to act as an indicator to show where the player will move to. The script then calculates the position of this spawned game object and moves the selected player object towards it. While the player is moving a bool for player movable is set to false this restricts the player from moving again while in motion. Finally the player is tagged InActPlayer meaning the specific player object is no longer active or able to be moved. The system that checks what is a player object looks for objects tagged player thus when the player object is given a new tag it is no longer considered a player object. The final part of this script is a timer for the players turn once the player has moved all of their pieces they can press an onscreen button that manually ends the turn or wait til the timer hits zero either way the when the turn ends the player’s pieces are given movement again by being retagged as Player. The main issue with the current script was it struggled to get rigid bodies of a specific tag; this resulted in my work around solution of only getting the rigidbody of the object clicked. This system works as intended when the player selects an object and moves that object before selecting a new object, however if the player selects a new object and then attempts to move both objects clicked will move to the indicator at the same time. A method to solve this would be to use the recently created game manager that keeps track of selected objects and use it to only move that object. The stopping of the player object is handled by a separate script.
using UnityEngine;
using UnityEngine.Tilemaps; //Unity Tile map system
using System.Collections;

// Declaring a class named Test that inherits MonoBehaviour
public class Test : MonoBehaviour
{
    // Public variables accessible from Unity Editor
    public Camera mainCamera; // Referece to the main camera
    public GridLayout gridLayout; // Reference to the grid nlayout
    public GameObject objectToSpawn; //Spawns indicator
    public Rigidbody playerRigidbody;
    public float playerSpeed = 25f; // Speed at which the player moves
    public bool playerMovable = true; // indicates if the player is movable
    public float Timer = 10f; // Timer total time
    GameObject selectedObject; // Reference to the selected object in the game

    // Start is called before the first frame update
    private void Start()
    {
        // Get the player's rigidbody component
        playerRigidbody = GetComponent();
    }

    // Update is called once per frame
    void Update()
    {
        // Check if GameManager has a selected object
        if (GameManager.Instance.selectedObject != null)
        {
            // Get the selected object
            selectedObject = GameManager.Instance.GetSelectedObject();
        }
    }

    // Function to center a position on the grid
    Vector3 CenterOnGrid(Vector3 position)
    {
        // Get the cell position from world position
        Vector3Int cellPosition = gridLayout.WorldToCell(position);
        // Calculate the centered point on the grid
        Vector3 centeredPoint = gridLayout.LocalToWorld(gridLayout.CellToLocalInterpolated(cellPosition + new Vector3(0.5f, 0.5f, 0)));
        return centeredPoint;
    }

    // Function to instantiate an object at a centered point
    void InstantiateObjectAtCenteredPoint(Vector3 centeredPoint)
    {
        // Instantiate the object at the centered point with no rotation
        Instantiate(objectToSpawn, centeredPoint, Quaternion.identity);
    }

    // Function to stop the player's movement
    private void StopObject()
    {
        // Check if the player's rigidbody exists
        if (playerRigidbody != null)
        {
            // Set the player's velocity to zero
            playerRigidbody.velocity = Vector3.zero;
        }
    }

    // Function called when player triggers a collider
    private void OnTriggerEnter(Collider other)
    {
        // Check if the collider's tag is "test"
        if (other.CompareTag("test"))
        {
            // Stop the player's movement and allow them to move again
            StopObject();
            playerMovable = true;
            // Log message to the console
            Debug.Log("Can Move Again");
        }
    }

    // Coroutine function for player movement
    public IEnumerator ClickToMoveCoroutine()
    {
        // Loop indefinitely
        while (true)
        {
            // Check if player can move and if mouse button is pressed or touch is detected
            if ((Input.GetMouseButtonDown(0) || (Input.touchCount > 0 && Input.GetTouch(0).phase == TouchPhase.Began)) && playerMovable)
            {
                // Get the input position
                Vector3 inputPosition;
                if (Input.touchCount > 0)
                {
                    inputPosition = Input.GetTouch(0).position;
                }
                else
                {
                    inputPosition = Input.mousePosition;
                }

                // Cast a ray from the main camera to the input position
                Ray ray = mainCamera.ScreenPointToRay(inputPosition);
                RaycastHit hit;

                // Check if the ray hits something
                if (Physics.Raycast(ray, out hit))
                {
                    // Check if the collider's tag is "NavGround"
                    if (hit.collider.CompareTag("NavGround"))
                    {
                        // Prevent further movement until current movement is completed
                        playerMovable = false;

                        // Find all game objects tagged as "ActPlayer"
                        GameObject[] actPlayers = GameObject.FindGameObjectsWithTag("ActPlayer");

                        // Loop through each ActPlayer object
                        foreach (GameObject actPlayer in actPlayers)
                        {
                            // Get the Rigidbody component of the ActPlayer object
                            Rigidbody actPlayerRigidbody = actPlayer.GetComponent();

                            // Check if the Rigidbody component exists
                            if (actPlayerRigidbody != null)
                            {
                                // Get the hit point and center it on the grid
                                Vector3 hitPoint = hit.point;
                                Vector3 centeredPoint = CenterOnGrid(hitPoint);

                                // Move the ActPlayer towards the centered point
                                MovePlayerTowards(centeredPoint, actPlayerRigidbody);

                                // Instantiate an object at the centered point
                                InstantiateObjectAtCenteredPoint(centeredPoint);
                            }
                        }
                    }
                    else
                    {
                        // Log message to the console
                        Debug.Log("Object clicked is not tagged as NavGround");
                    }
                }
            }
            else if ((Input.GetMouseButtonDown(0) || (Input.touchCount > 0 && Input.GetTouch(0).phase == TouchPhase.Began)) && !playerMovable)
            {
                // Log message to the console
                Debug.Log("Can't Move");
            }

            // Wait for the next frame
            yield return null;
        }
    }

    // Function to move the player towards a target position
    void MovePlayerTowards(Vector3 targetPosition, Rigidbody actPlayerRigidbody)
    {
        // Check if the object is tagged as "ActPlayer"
        if (!actPlayerRigidbody.CompareTag("ActPlayer"))
        {
            // Log message to the console
            Debug.Log("Object is not tagged as ActPlayer. Movement is not allowed.");
            return;
        }

        // Check if the Rigidbody component is not assigned
        if (actPlayerRigidbody == null)
        {
            // Log error message to the console
            Debug.LogError("ActPlayer Rigidbody is not assigned.");
            return;
        }

        // Calculate the direction from the player to the target position
        Vector3 direction = (targetPosition - actPlayerRigidbody.transform.position).normalized;

        // Move the ActPlayer towards the target position with a specific speed
        actPlayerRigidbody.velocity = direction * playerSpeed;
    }
}
The next script created was a script called “ObjectSelect” that allows the player to select one of the variety of units they have at their disposal. The script begins similarly to the “test” script: it gets the camera to determine the clicked points relative position. From the clicked point a raycast is summoned if the summoned raycast intersects an object tagged player it then designates it as the selected gameobject and retags the object as ActPlayer and changes the material to signify the selected object. At the time this was the only way I could figure out how to let my two scripts communicate as the “test” script only allows movement of objects tagged ActPlayer. When the player then clicks another player object the previously selected object is deselected and reverted to its previous material, however due to issues tagging and retagging the player remains as ActPlayer this results in some unwanted behavior. For the future selection systems this method tagging will not be repeated.
using System.Collections;
using System.Collections.Generic;
using UnityEngine;

public class ObjectSelect : MonoBehaviour
{
    [SerializeField] Camera mainCamera;
    private GameObject selectedObject;
    private Test ClickToMove;

    public Material highlightMaterial;
    public Material originalMaterial;

    void Start()
    {
        // Get reference to the main camera
        mainCamera = Camera.main;
        ClickToMove = GetComponent();

    }

    void Update()
    {
       SelectObject();
    }

    // Deselect the currently selected object
    void DeselectObject()
    {
        if (selectedObject != null)
        {
            // Restore original material
            selectedObject.GetComponent().material = originalMaterial;
            Debug.Log("Material is: " + originalMaterial.name);

            // Change tag back to "Player"
            if(selectedObject.CompareTag("Player"))
            {
                     selectedObject.tag = "Player";
            }

        }

        selectedObject = null;
    }

    void SelectObject()
    {
         // Check if the left mouse button is clicked
        if (Input.GetMouseButtonDown(0))
        {
            // Cast a ray from the mouse position
            Ray ray = mainCamera.ScreenPointToRay(Input.mousePosition);
            RaycastHit hit;

            // Check if the ray hits any collider
            if (Physics.Raycast(ray, out hit))
            {
                // Check if the hit object has a Rigidbody (to allow movement)
                Rigidbody rb = hit.collider.GetComponent();

                if (rb != null)
                {
                    // Check if the hit object is not tagged as "InActPlayer"
                    if (!hit.collider.CompareTag("InActPlayer"))
                    {
                        // Deselect the previously selected object (if any)
                        DeselectObject();

                        // Select the newly clicked object
                        selectedObject = hit.collider.gameObject;
                        GameManager.Instance.selectedObject = selectedObject;
                        Debug.Log("Object selected: " + hit.collider.gameObject.name);
                        // isObjectSelected = true;

                        // Change the tag of the selected object
                        selectedObject.tag = "ActPlayer";

                        if (ClickToMove != null)
                        {
                            ClickToMove.StartCoroutine(ClickToMove.ClickToMoveCoroutine());
                            Debug.Log("Coroutine started");
                        }
                        else
                        {
                            Debug.LogError("Test script not found.");
                        }

                    }
                }
            }
            else
            {
                // If clicked on empty space, deselect any selected object
                DeselectObject();
            }

            if (selectedObject != null)
            {
                selectedObject.GetComponent().material = highlightMaterial;
            }
        }
    }
}
As stated before the “test” script that is primarily responsible for game movement is not responsible for handling the stopping. Initially the “test” script was responsible for the stopping of the player through the use of a timer. A stop timer was set to 1 or 2 seconds when the player began moving the timer would start and when the timer hits zero the player would stop however there were several issues with this approach. The main issue with this approach however was that the player object would be misaligned from the grid. So instead the stopping was moved to a separate script that instead uses extremely small box colliders on the indicator and every player object when the player collides the indicator the player stops and the indicator is destroyed. The function of stopping was moved back to the “test” script but the removal of the indicator still remains within the “StopAtDestination” script as seen below.
public class StopAtDestination : MonoBehaviour
{
    private Test ClickToMove;

    void Start()
    {
        ClickToMove = GetComponent();
    }

    void OnTriggerEnter(Collider other)
    {
        if (other.CompareTag("ActPlayer") || other.CompareTag("InActPlayer"))
        {
            //Debug.Log("Destroy");
            Destroy(this.gameObject);
            GameObject[] actPlayers = GameObject.FindGameObjectsWithTag("ActPlayer");

            // Iterate through each game object and change its tag to "InActPlayer"
            foreach (GameObject player in actPlayers)
            {
                player.tag = "InActPlayer";
            }

            Debug.Log("Tags changed successfully.");
        }

    }
}
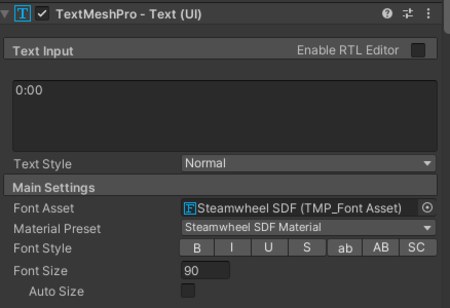
The script below is the “turn timer” script , it ensures that the current turn timer is displayed on the UI at all times. It consists of two parts: the UI displayed timer and the reset timer function when the turn has ended. The script starts the timer at the designated value in the current case 60 seconds, then begins counting down from then on until the timer either hits 0 or the reset timer function is called manually via the end turn button. The timer ensures the player has a sense of urgency and makes sure the game moves forward at a steady pace.
using System.Collections;
using System.Collections.Generic;
using UnityEngine;
using TMPro;

public class TurnTimer : MonoBehaviour
{
    public float totalTime = 60f; // Total time for the countdown
    private float currentTime; // Current time left
    public TextMeshProUGUI timerText; // TMP text to display the timer

    void Start()
    {
        // Initialize the current time
        currentTime = totalTime;
    }

    void Update()
    {
        // Update the current time
        currentTime -= Time.deltaTime;

        // Check if the timer has run out
        if (currentTime <= 0)
        {
            currentTime = 0; // Ensure the timer doesn't go below 0
            // Do something when the timer runs out, like end the game or trigger an event
            Debug.Log("Time's up!");
        }

        // Update the timer text
        UpdateTimerDisplay();
    }

    void UpdateTimerDisplay()
    {
        // Calculate minutes and seconds from the current time
        int minutes = Mathf.FloorToInt(currentTime / 60f);
        int seconds = Mathf.FloorToInt(currentTime % 60f);

        // Update the TMP text to display the timer
        timerText.text = string.Format("{0:00}:{1:00}", minutes, seconds);
    }

    // Method to reset the timer
    public void ResetTimer()
    {
        currentTime = totalTime; // Reset the current time to the total time
        ChangeTags();
    }

    // Method to change tags from "InActPlayer" to "Player"
    public void ChangeTags()
    {
        GameObject[] inActPlayers = GameObject.FindGameObjectsWithTag("InActPlayer");
        foreach (GameObject player in inActPlayers)
        {
            player.tag = "Player";
        }
    }
}
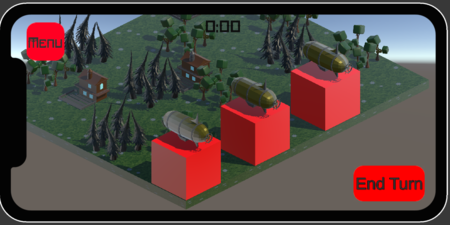
Prior to the creation of “Movement Limit” script the player was free to move wherever there was a ground tile. This script restricts the player's navigable area to tiles tagged as “NavGround” , short for navigable ground. It actively tags objects around the selected object it tags any objects tagged Ground as Background through the use of several box colliders that surround the selected object. Then a change made in the “test” script only allows the player to click on NavGround tiles; this means that the player objects can only ever move one space in any direction. The plan for the game was to create several different units capable of moving different amounts, so by adjusting the sizes of the box colliders which can be done by a field in the editor each unit can move a different amount while using the same script.
using System.Collections;
using System.Collections.Generic;
using UnityEngine;

public class MovementLimit : MonoBehaviour
{
    [SerializeField] string NavGround = "NavGround";
    [SerializeField] Vector3 boxSize = new Vector3(5f, 1f, 5f); // Size of each box-shaped region
    private HashSet taggedObjects = new HashSet();
    private ObjectSelect objectSelectScript;

    GameObject selectedObject;

    void Start()
    {

    }

    void Update()
    {
        // Access the selected object from the ObjectSelect script
        if(GameManager.Instance.selectedObject != null)
        {
            selectedObject = GameManager.Instance.GetSelectedObject();
        }
        if (selectedObject != null)
        {
            ChangeTags();
            RevertTags();
        }
        else
        {
            DisableBoxes();
        }
    }


    // Disable the boxes
    void DisableBoxes()
    {
        //Debug.Log("Boxes disabled");
        // Revert the tags back to "Ground" when disabling the boxes
        RevertTags();
    }

    void ChangeTags()
    {
        selectedObject = GameManager.Instance.GetSelectedObject();
        if (selectedObject != null)
        {
            // Define the positions of the four box-shaped regions around the selected object
            Vector3[] boxPositions = new Vector3[]
            {
                selectedObject.transform.position + new Vector3(-5f, -3f, 0f),
                selectedObject.transform.position + new Vector3(0f, -3f, 5f),
                selectedObject.transform.position + new Vector3(0f, -3f, -5f),
                selectedObject.transform.position + new Vector3(5f, -3f, 0)
            };

            // Check for colliders in each box-shaped region
            foreach (Vector3 pos in boxPositions)
            {
                Collider[] colliders = Physics.OverlapBox(pos, boxSize / 2f);

                foreach (Collider col in colliders)
                {
                    if (col.gameObject.CompareTag("Ground"))
                    {
                        col.gameObject.tag = NavGround;
                        taggedObjects.Add(col.gameObject);
                    }
                }
            }

            //Debug.Log("Tag Changed");
        }
    }

    void RevertTags()
    {
        selectedObject = GameManager.Instance.GetSelectedObject();
        // Check if tagged objects are still within the box-shaped regions
        foreach (GameObject obj in new List(taggedObjects))
        {
            if (selectedObject != null)
            {
                // Define the positions of the four box-shaped regions around the selected object
                Vector3[] boxPositions = new Vector3[]
                {
                    selectedObject.transform.position + new Vector3(-5f, -3f, 0f),
                    selectedObject.transform.position + new Vector3(0f, -3f, 5f),
                    selectedObject.transform.position + new Vector3(0f, -3f, -5f),
                    selectedObject.transform.position + new Vector3(5f, -3f, 0)
                };

                bool isInAnyBox = false;

                foreach (Vector3 pos in boxPositions)
                {
                    Collider[] colliders = Physics.OverlapBox(pos, boxSize / 2f);

                    if (IsInColliders(obj, colliders))
                    {
                        isInAnyBox = true;
                        break;
                    }
                }

                if (!isInAnyBox)
                {
                    // Revert the tag back to "Ground"
                    obj.tag = "Ground";
                    taggedObjects.Remove(obj);
                }
            }
        }
    }

    bool IsInColliders(GameObject obj, Collider[] colliders)
    {
        foreach (Collider col in colliders)
        {
            if (col.gameObject == obj)
            {
                return true;
            }
        }
        return false;
    }
}

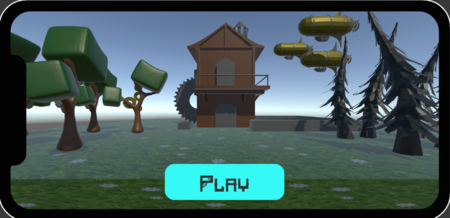
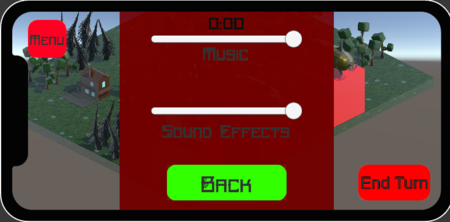
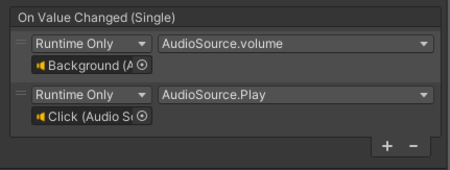
The game's UI is composed of several simple buttons as well as a few scripts that allow for basic functionality including a pause menu, a settings menu, and a sound menu. Each of the 3 menus remain in the hierarchy and depending on the button clicked a specific UI element is toggled on to be visible to the player. The script uses Unity on click functionality and event listener to call on select methods to open and close the menus. The sound and music sliders use a similar system however it instead uses a value to raise and lower the sound of the game's audio. The “PauseMenu” script is also responsible for changing the current scene when either the play button on the start menu is pressed or the quit menu is pressed on the setting menu within the game.
using System.Collections;
using System.Collections.Generic;
using UnityEngine;
using UnityEngine.SceneManagement;

public class PauseMenu : MonoBehaviour
{
    [SerializeField] GameObject MenuUI;
    [SerializeField] GameObject SoundUI;
    [SerializeField] GameObject SoundSound;
    public string StartMenu;

    public Test testScript;
    public ObjectSelect objectSelectScript;


    private void Start()
    {
        // Get references to the Test and ObjectSelect scripts
        testScript = FindObjectOfType();
        objectSelectScript = FindObjectOfType();
    }

    public void ToggleMenuUI()
    {
        if (MenuUI.activeSelf)
        {
            MenuUI.SetActive(false);
            // Re-enable the Test and ObjectSelect scripts when the menu is closed
            if (testScript != null) testScript.enabled = true;
            if (objectSelectScript != null) objectSelectScript.enabled = true;
        }
        else
        {
            MenuUI.SetActive(true);
            SoundUI.SetActive(false);
            // Disable the Test and ObjectSelect scripts when the menu is opened
            if (testScript != null) testScript.enabled = false;
            if (objectSelectScript != null) objectSelectScript.enabled = false;
        }
    }

    public void ToggleSoundUI()
    {
        if (SoundUI.activeSelf)
        {
            SoundUI.SetActive(false);
        }
        else
        {
            SoundUI.SetActive(true);
            MenuUI.SetActive(false);
        }
    }

    // Method to be called when the button is clicked
    public void LoadScene()
    {
        // Load the scene
        SceneManager.LoadScene(StartMenu);
    }
}
The final script of the project was created purely for testing purposes.It was created to operate with the “test” script before a stop function was created. It does a single thing, that being, it stops all velocity on the current object. This script helped with theorizing possible ways to stop the player once they reached the destination.
using UnityEngine;

public class StopMovement : MonoBehaviour
{
    // Reference to the Rigidbody component
    private Rigidbody rb;

    private void Start()
    {
        // Get the Rigidbody component attached to the GameObject
        rb = GetComponent();

        if (rb == null)
        {
            Debug.LogError("Rigidbody component not found!");
        }
    }

    private void Update()
    {
        // Check if you want to stop the movement, for example, when the player presses a key
        if (Input.GetKeyDown(KeyCode.Space))
        {
            StopObject();
        }
    }

    // Method to stop the movement
    private void StopObject()
    {
        // Check if Rigidbody is available
        if (rb != null)
        {
            // Stop the movement by setting velocity to zero
            rb.velocity = Vector3.zero;
        }
    }
}
Some other minor achievements consist of the compilation of the group's work combining all the assets to create a functional final product. This process involved working directly with other group members to first understand what their code does and how it works to achieve it. Then I needed to take the provided code, create scripts in unity for them then add more code to them/ rework them to ensure they function with my code. This process took significantly longer than predicted and as such set the group back a few days in development. Another miscellaneous task completed was the creation of an app icon for our game. The app icon is 180 x 180 pixel png with a design to communicate the idea of our steampunk style strategy game. The image seen here is a version of the logo converted to a jpg and slightly increased in size for view purposes. The design of the logo was intended to be simplistic while conveying the idea of steampunk. The simplicity was key to the idea the group had in mind, the idea was to create a small game scene in blender to display behind the gear replacing the black background the icon has. While this plan was never brought to fruition, the unfinished logo can still be seen here. These two tasks while slowed development quite significantly these were tasks imperative to the proper completion of the required criteria.

Other Resources include music by ifprizmic and the grass texture by Zorak-Art both are linked here.
Stylized Grass Texture Game Music